NOTE: Please view this FAQ to see which rooms are "Video-Enabled" classrooms: https://ithelp.harrisburgu.edu/support/solutions/articles/44001892168-classroom-and-conference-room-av-capabilities
If unsure how to use the classroom technology, please refer to this guide: https://ithelp.harrisburgu.edu/support/solutions/articles/44001711706-how-to-use-classroom-technology
NOTE: To watch a video guide of this solution article, click the link below:
--> How to Use the Classroom Technology Part 2 - Holding a Hybrid Class using Microsoft Teams <--
TABLE OF CONTENTS
- Section 1: Intro
- Section 2: Setup
- Section 3: How to Share your Screen
- Section 4: How to Record
- Section 5: Controlling the Camera Direction
- Section 6: Volume Control
- Section 7: Shutting Down the System
Section 1: Intro
Some of our classrooms are "Video-Enabled" classrooms. These classrooms have a built-in camera and ceiling microphone* installed in the classroom.
If you are in a "Video-Enabled" classroom, you can use the Room PC at the podium to hold a hybrid class using Microsoft Teams. Only the Room PC will be able to access the built-in room microphone and camera.
1. First, select "Room PC" on the touch panel located near the front of the room to turn on the system.
2. Log into the Room PC using your HU login credentials. Use your full HU email and password.
3. Open up Microsoft Teams on the Room PC. If Teams is not installed, please go to this link and install Microsoft Teams.
4. Join your Class by following the instructions in Section 2 of this support article. Alternatively, use the "Meet Now" feature also described in Section 2.
5. Make sure you share your screen if you are presenting any presentation materials such as a video or a PowerPoint presentation. To share your screen, follow the instructions found within Section 3 of this support article
5. If you want to Record your class, follow the instructions in Section 4 of this support article.
6. If you want to control the direction of the camera in the room, follow the instructions in Section 5 of this support article.
7. If you want to control the volume of the speakers, or mute and unmute the microphone in the room, follow the instructions in Section 6 of this support article.
8. To shut down the system, follow the instructions found in Section 7 of this support article.
9. Click here to find out how to ask for help during your class for immediate support
*Note: Rooms 1205, 1305 and 1412 do not have a microphone installed in the ceiling. Instead, the microphones are located on their charging station. These mics need to be switched "on" before use. Please return the microphones to their charging station when finished. Contact IT at x5177 with any questions.
Section 2: Setup
***You must use the Room PC to access the camera and microphone built into the room***
Accessing your Microsoft Teams Class from Canvas
1. Select "Room PC" on the touch panel to turn on the system. Use any input on the podium mouse and keyboard to "wake up" the Room PC. Then, log into the Room PC using your HU login credentials.
2. Navigate to Canvas with the following link. https://harrisburgu.instructure.com/
3. To access your Microsoft Teams Classes session in Canvas, go to your course page and click on the Microsoft Teams Classes tab.

4. Click on the Microsoft Teams Class
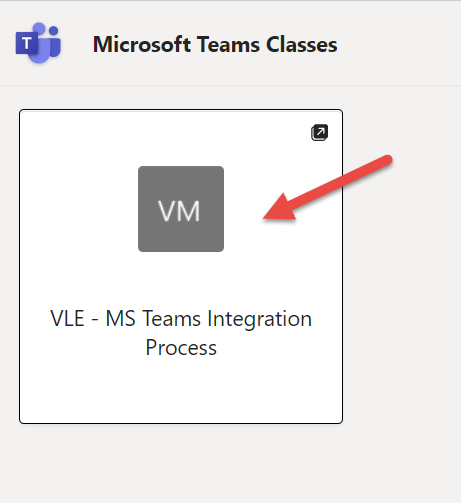
5. Identify and select the lecture or session that you created in your Microsoft Teams Class.

6. Use the 'Join' button to access the lecture or session meeting space.
Alternate Method: Join a new Meeting using "Meet Now"
1. Once logged into the Room PC, double-click the Microsoft Teams icon to open the application.

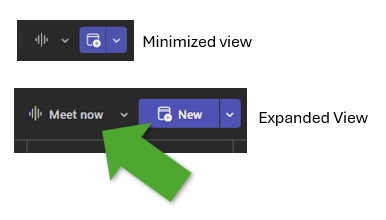
2. On the side bar, click on "Calendar".

3. Click on the "Meet Now" button on the upper righthand side.
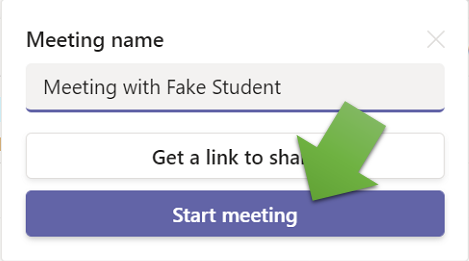
4. Then click on "Start Meeting."
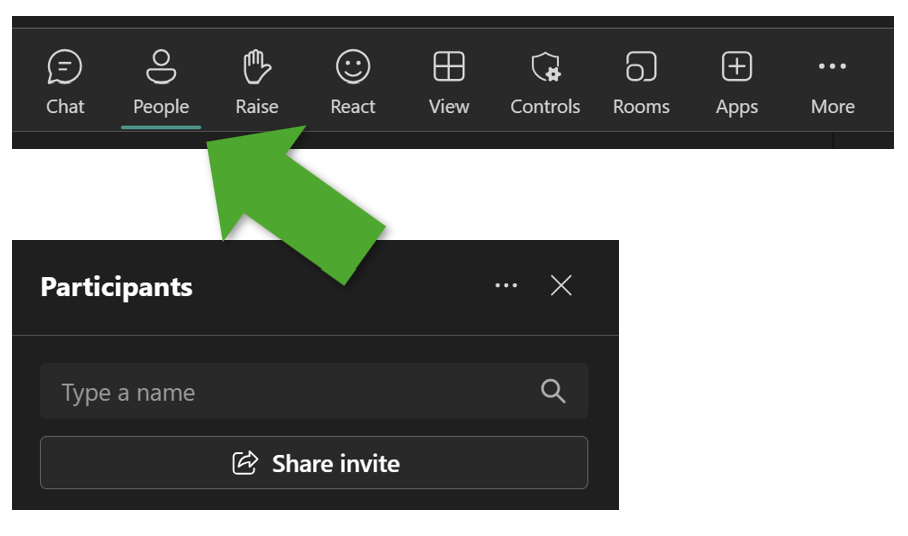
5. To invite someone to the meeting, click on the "People" tab to open up the Participants. Then, type a name or email to invite them to the meeting. You can also click "Share Invite" to copy the meeting invitation or send the invitation over email.
How to check your audio and video settings
When the pre-meeting popup appears, make sure you check your audio and video settings.
1. Select Computer audio (should be selected by default)
2. Unmute your microphone
3. Unhide your camera
4. Click "Join Now" to join the meeting.
Note: Rooms 1205, 1305 and 1412 do not have a microphone installed in the ceiling. Instead, the microphones are located on their charging station. These mics need to be switched "on" before use. Please return the microphones to their charging station when finished. Contact IT at x5177 with any questions.

*If you are unable to hear the meeting attendees or if they can't hear you, make sure you check the Device settings. They should look like one of the two options below:
Go to the three little dots at the top and click on them. Then click on device settings.
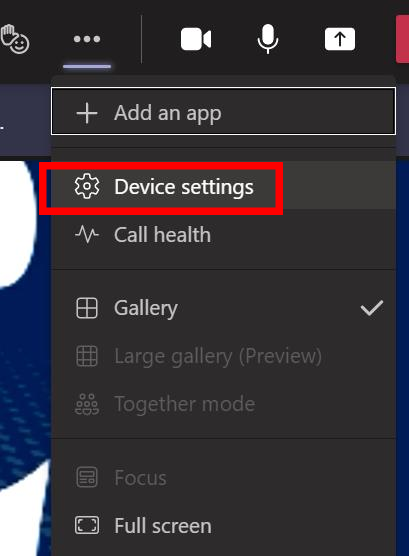
The Device settings should look like one of the two options below.

If that's not the case, please call IT Support at ext. 5177 from the room phone. We will send somebody up to assist you ASAP.
Section 3: Share your Screen or Window
To share something, click on the "Share" button and then select your computer screen or the window you want to share. If you are sharing a video that includes sound, make sure you turn on "Include computer sound."

Section 4: Recording Your Class in Microsoft Teams
1. Once in the meeting, click on the three little dots and then "Start Recording."
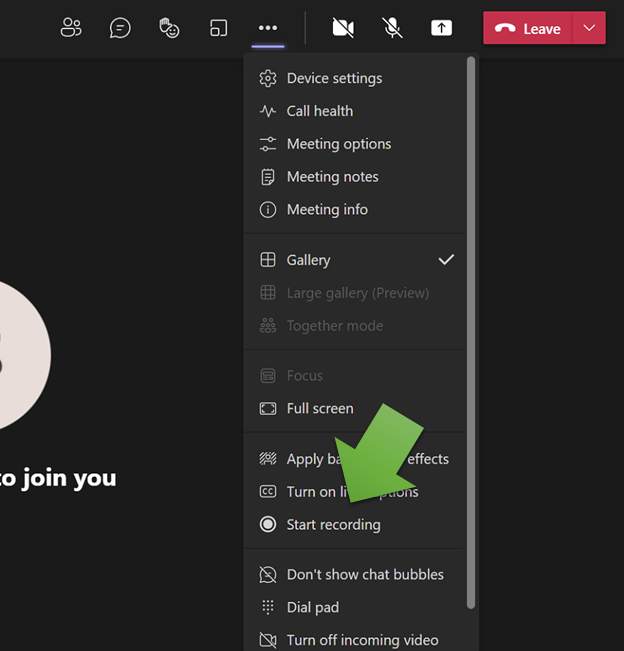
A red dot will appear in the upper left corner to let you know that you are successfully recording.

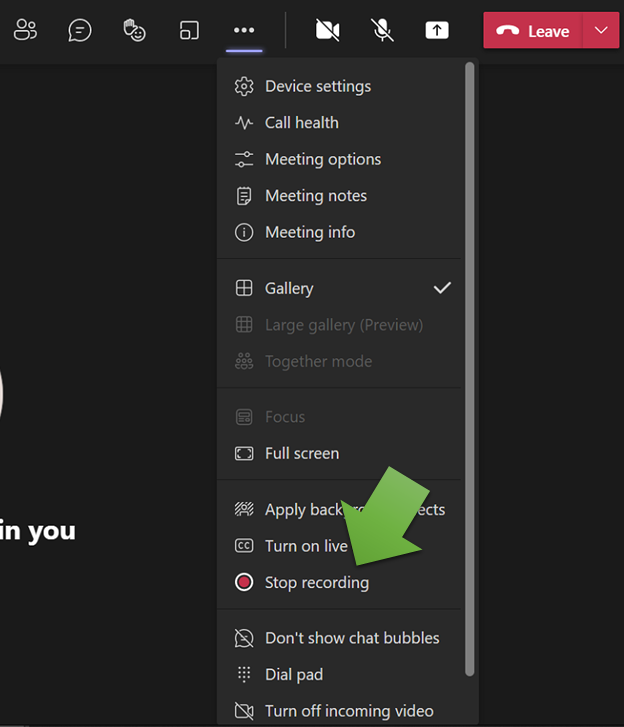
2. Once you are done recording, click on the three little dots again and click "Stop Recording."
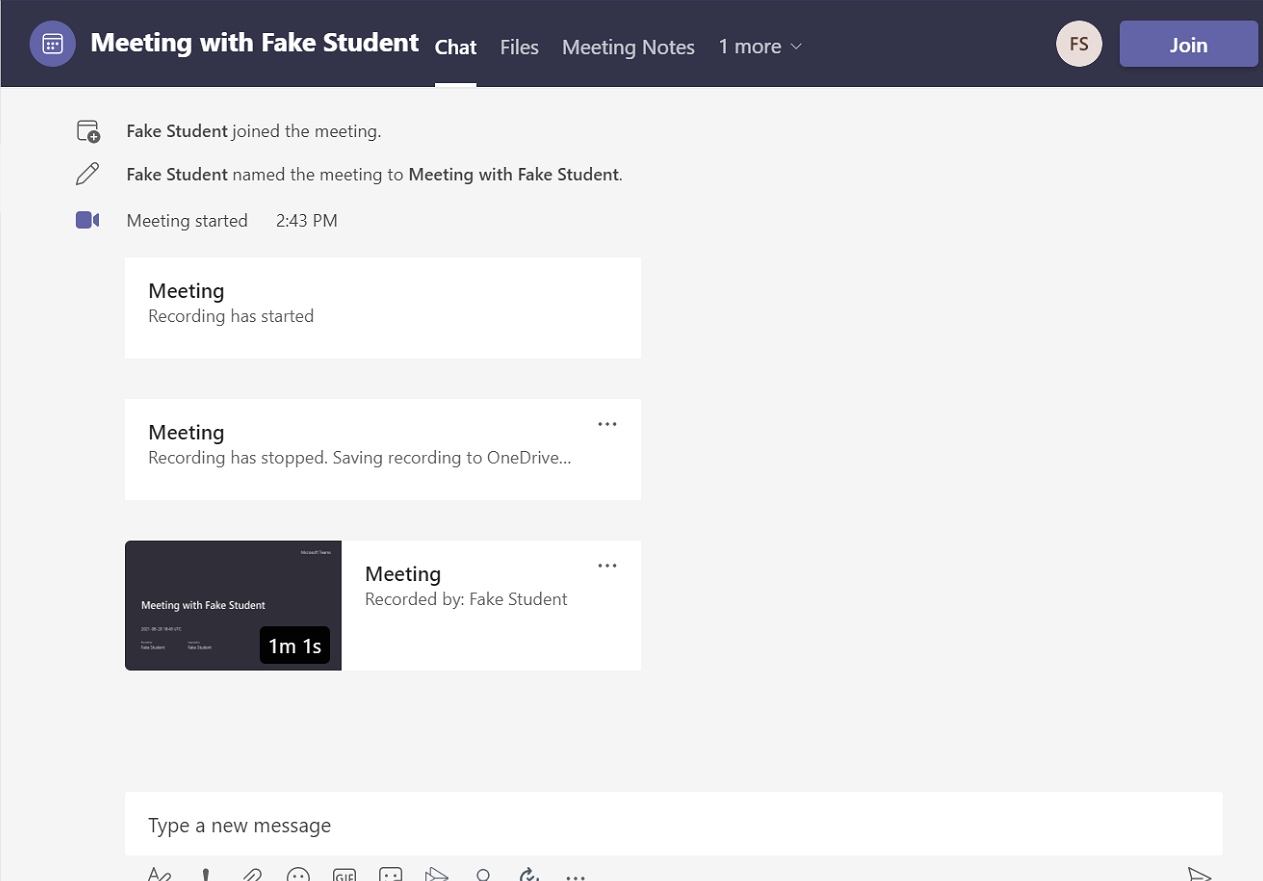
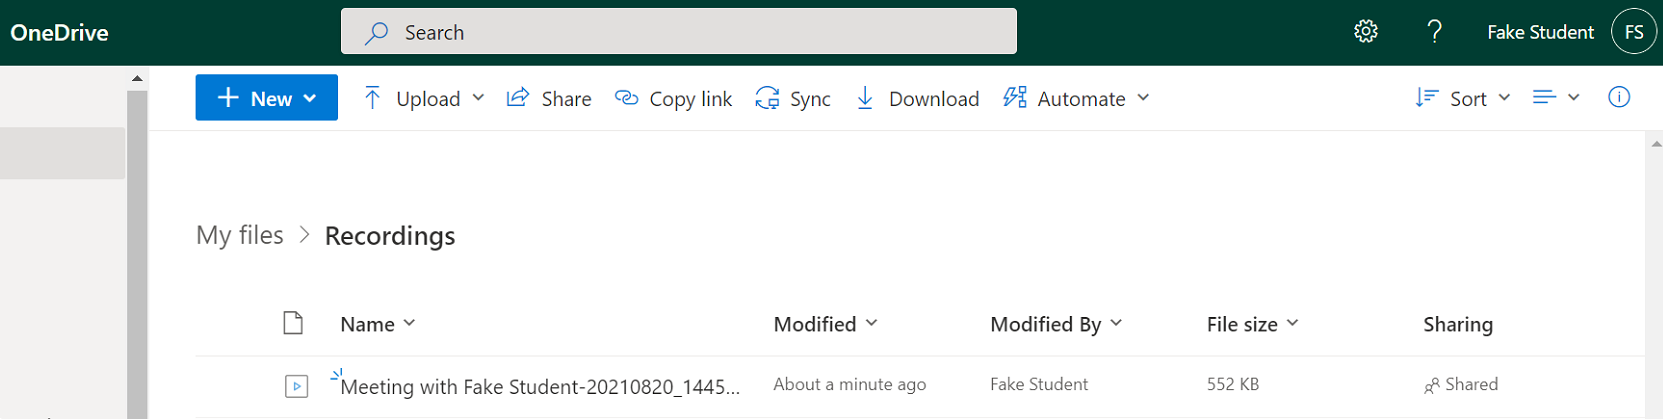
3. You will then be able to find the recording in your meeting chat which will appear in your chat menu. You can also find it in the meeting organizer's OneDrive under a folder called "Recordings."
Section 5: Controlling the Camera Direction
When you walk into a "Video-Enabled" classroom, you will either see a camera mounted on the ceiling or mounted on the wall near the back of the classroom.
Please choose an option below that applies to which camera you have.
Option 1 - Camera on Wall
Option 1 applies to the following classrooms:
- 326 Market Street: 1004, 1005, 1046, 1054, 1058, 1104, 1112, 1205, 1305, 1312, 1354, 1412
- 222 Chestnut Street: 211C, 216, 313, 420, 429, 430,431, 520, 526, 533, 601, 613, 614, 621, 622, 624, 701, &725
1. Walk over to the touch panel and turn on the system by tapping the screen and selecting "Room PC"

2. Look to see if there is a "Camera Control" option at the top.
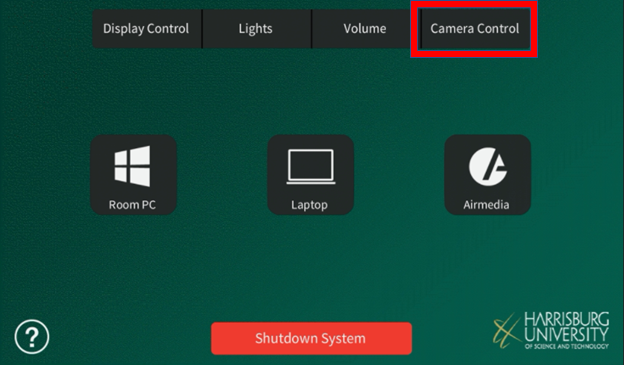
*Note: if you do not see this option, and you are in a Video-Enabled Classroom, check "Option 2 - Camera on Ceiling" found below.
3. From here, you can control the camera any way you would like. You can also disable the camera to turn it to privacy mode. Please allow the camera a few seconds to make the desired direction turn.
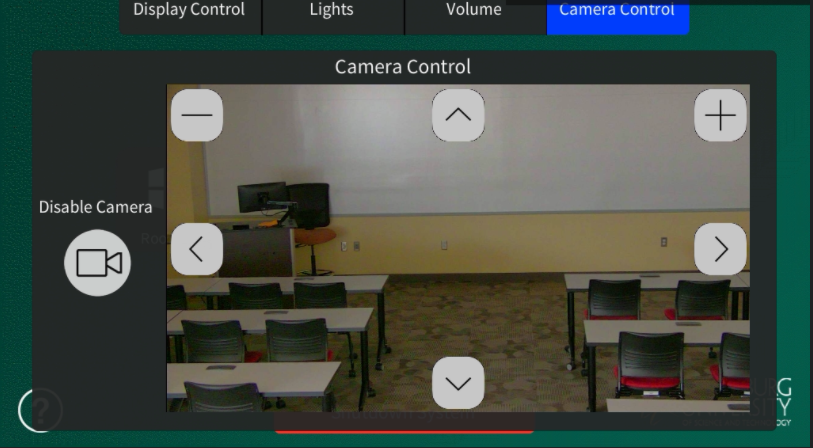
If the camera controls aren't working, please call IT Support at ext. 5177 from the room phone. We will send somebody up to assist you ASAP.
Option 2 - Camera on Ceiling
Option 2 applies to the following classrooms:
- 326 Market Street: 1204, 1212, 1246, 1254, 1258, 1358, 1463
1. If the classroom you are in does not have the "Camera Control" tab on the touch panel, you will need to log into the Room PC to change the camera settings.
2. Once logged onto the Room computer, look for this icon on the desktop.
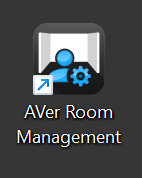
3. Once you click on the icon, it will open up a browser tab that looks like this. Click on "Setting" to access the camera controls.

4. From here, you are able to control the camera and zoom in and out.

Use these controls located at the bottom of the screen to control where the camera is focused on.

5. Close the AVer Room Management app when finished. Only one application may access the camera at a time, so Teams will not be able to access the camera while the Aver Room Management application is previewing the camera. You can mitigate this by opening Teams up first and Aver Room Management second. The camera controls will still work even if the Aver Room Management app does not see the camera preview.
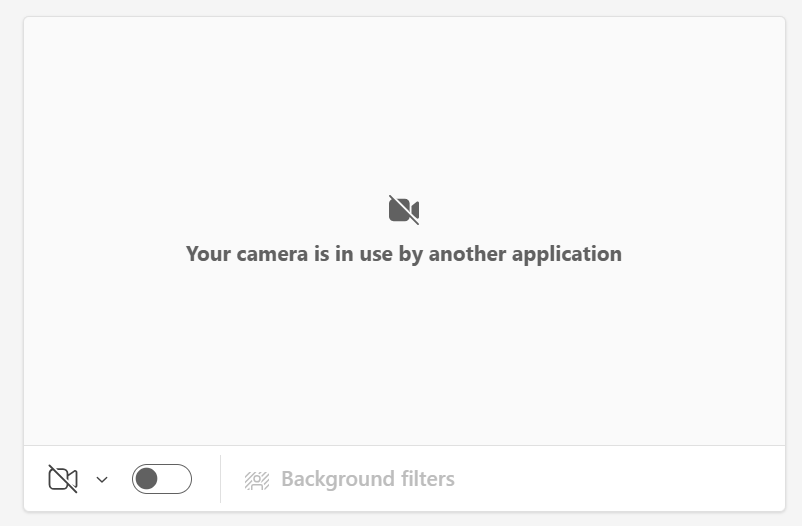
If you see this message, close the AVer Room Management application! Only one app can access the camera at a time.
Section 6: Accessing Volume Controls
1. On the main screen of the touch panel, click on the "Volume" tab.

2. On this screen, you can mute and unmute the microphone in the classroom. You can also turn up and down the volume of the overhead speakers in the room by clicking the volume control buttons under "Program"

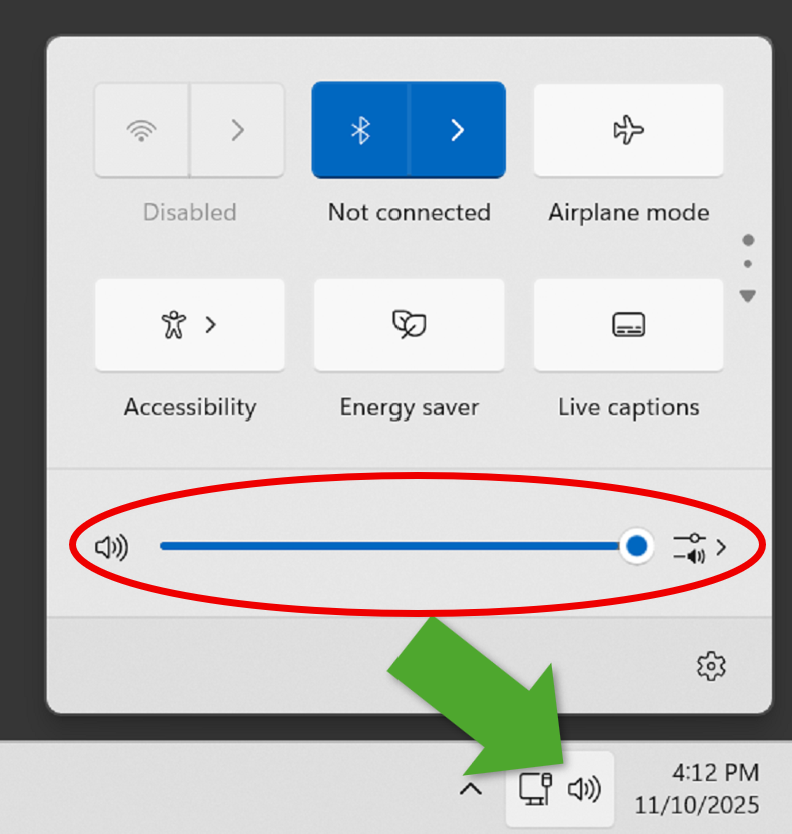
3. If you're experiencing problems with the volume, be sure to verify that the volume on the Room PC itself is unmuted, and the correct audio output is selected.
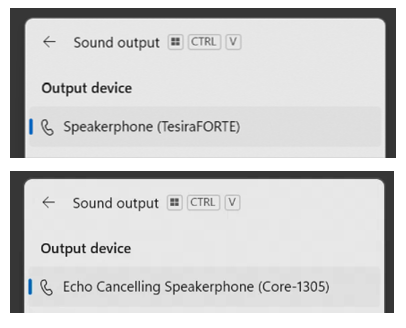
The correct audio output varies in different rooms. You should see one of following options. In a video-enabled classroom, he Room PC should default to the one of these two options. If you see any issues, please contact our help desk at x5177 so it can be corrected.
Section 7: Shutting Down the System
Please shut down the system when you are finished using it. There is an automatic shutdown timer after a 3-hour period of touch panel inactivity, but shutting down as soon as you are finished is good practice and helps extends the life of the projectors. Thank you.
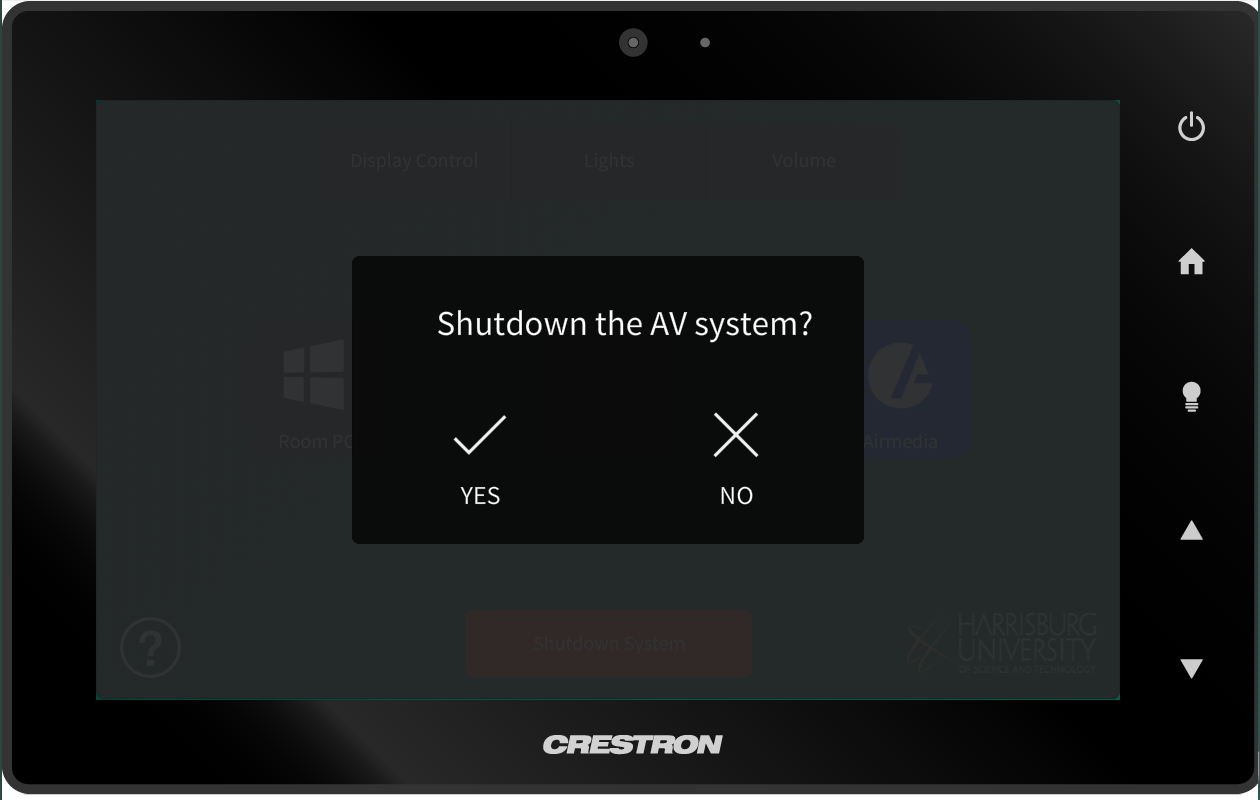
1. To turn off the system, select the "Shutdown System" button at the bottom of the screen.

2. Select Yes when prompted "Are you sure you want to shutdown the AV system?"
*You should then hear the projector beep and start to cool down. If the projector does not shut down after hitting yes, please try to turn off the system again. If that does not work, please contact the IT HelpDesk (x5177) by using the speed-dial labeled "Helpdesk" on a classroom phone. If you do not see a classroom phone in the room, you can call 717-901-5177 from a personal phone or email oishelp@harrisburgu.edu to create a ticket.
