Students and faculty may download and install Microsoft Visio and Microsoft Project from Microsoft Azure Dev Tools for Teaching (Azure Education). This service is available personnel that a qualified school engages to teach or instruct students, to conduct non-commercial research, or to do both. Also, any support staff who are responsible for maintaining departmental labs can install Azure Dev Tools for Teaching software onto their personal computers but only for evaluation purposes.
Prerequisite: To access all the benefits, every student/faculty will need to sign in to https://azureforeducation.microsoft.com/devtools, verify their account and accept terms and conditions, post which they will have access to all the benefits.
Downloading and Installing Microsoft Visio and Project
1. After accepting the terms and conditions you will be brought to a "Get Started" page in the Azure Education Hub.
2. Browse to the Software tab on the left hand side and search for the application "Visio" or "Project".


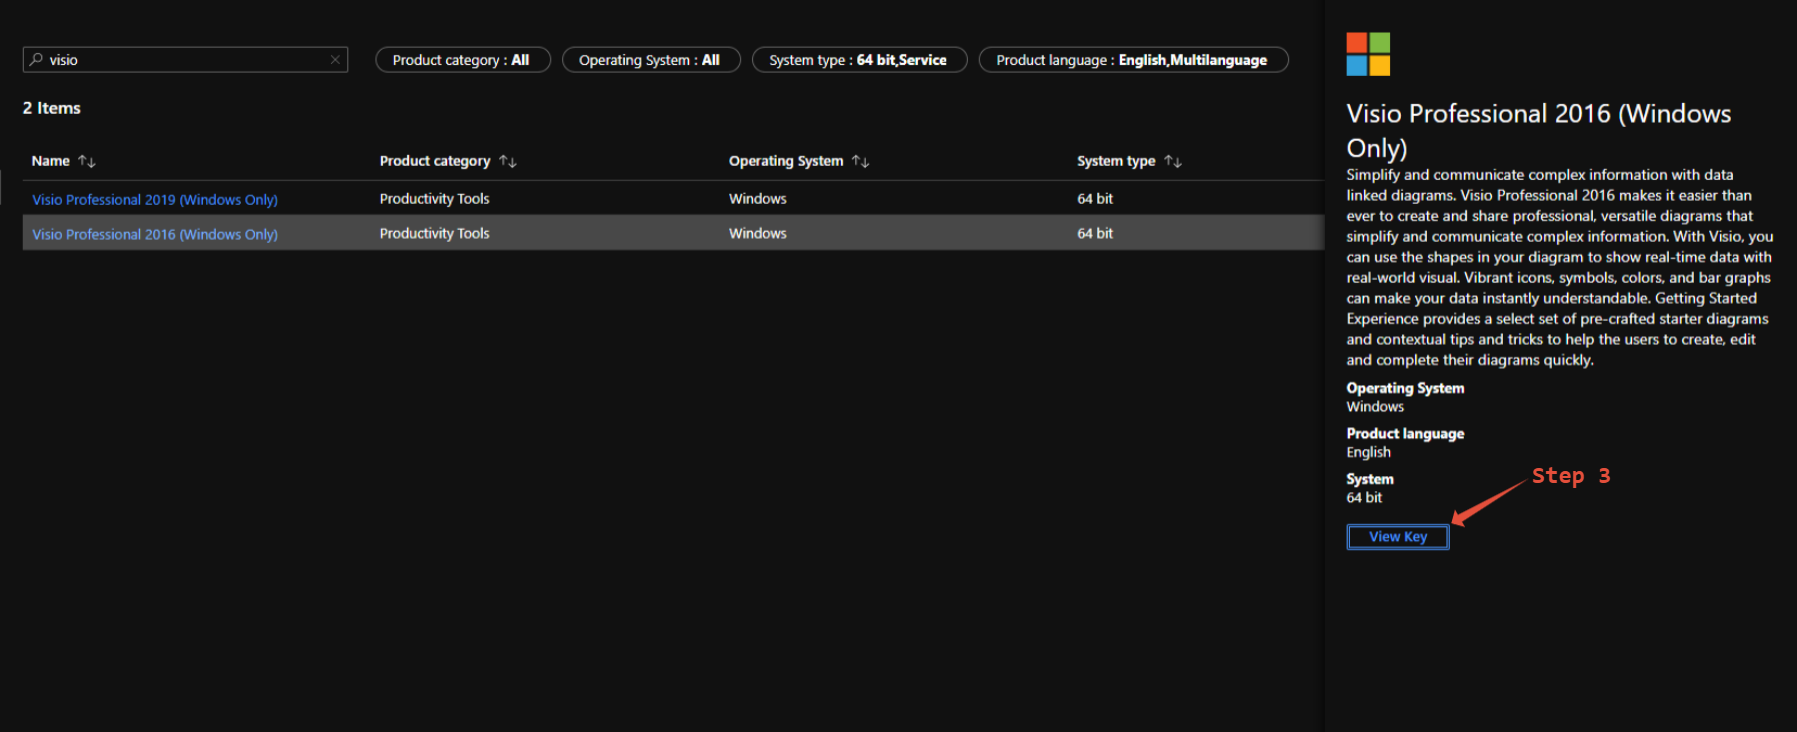
3. Select the version of Visio or Project you would like to install and click the view key button. Note: 32 bit and 64 bits versions are available in the package even though it only displays 64 bit.

4. Copy this key to notepad, it will be required after the application is installed.
5. Click the download button and save the .iso file to your computer. Note: The application will need 3.5 GB of free space.

6. After the .iso file is downloaded run the installation by double clicking the .iso file.
7. Double clicking the file should launch the file explorer. You will need to open the Office folder to see both Setup32.exe (32 bit) and Setup64.exe (64 bit). Note: If you have 32 bit Microsoft Office you will need to install 32 bit Visio or Project. If you have 64 bit Microsoft Office you will need to install Visio or Project 64 bit.


8. After launching either Setup32.exe or Setup64.exe you will begin installing Microsoft Visio or Project and see a progress window. You may be prompted to close any running Microsoft Application. Please continue and close these applications to allow the installation to proceed.


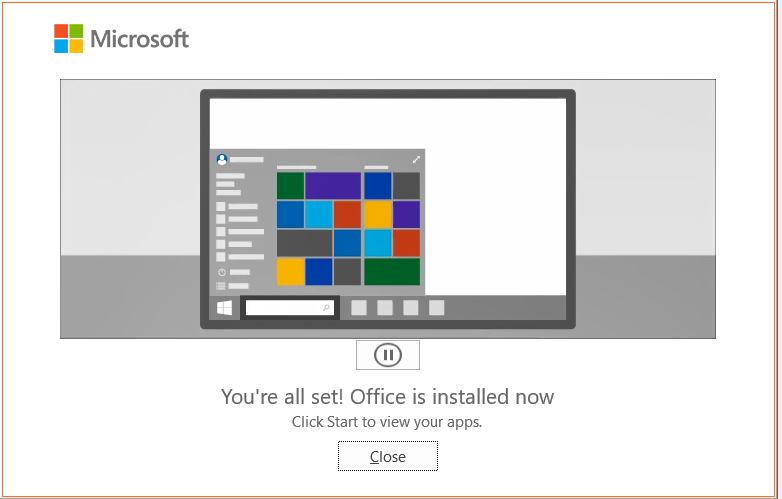
9. Once the installation completes you will see the window below. Click Close to proceed.
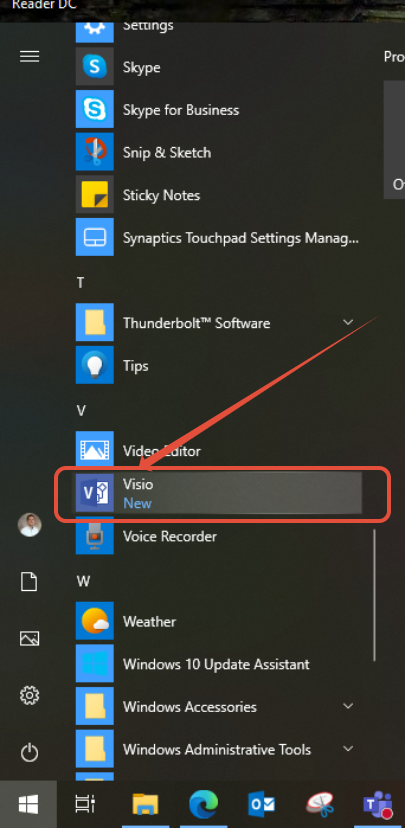
10. After installation completes you will find Visio or Project listed in the start menu.
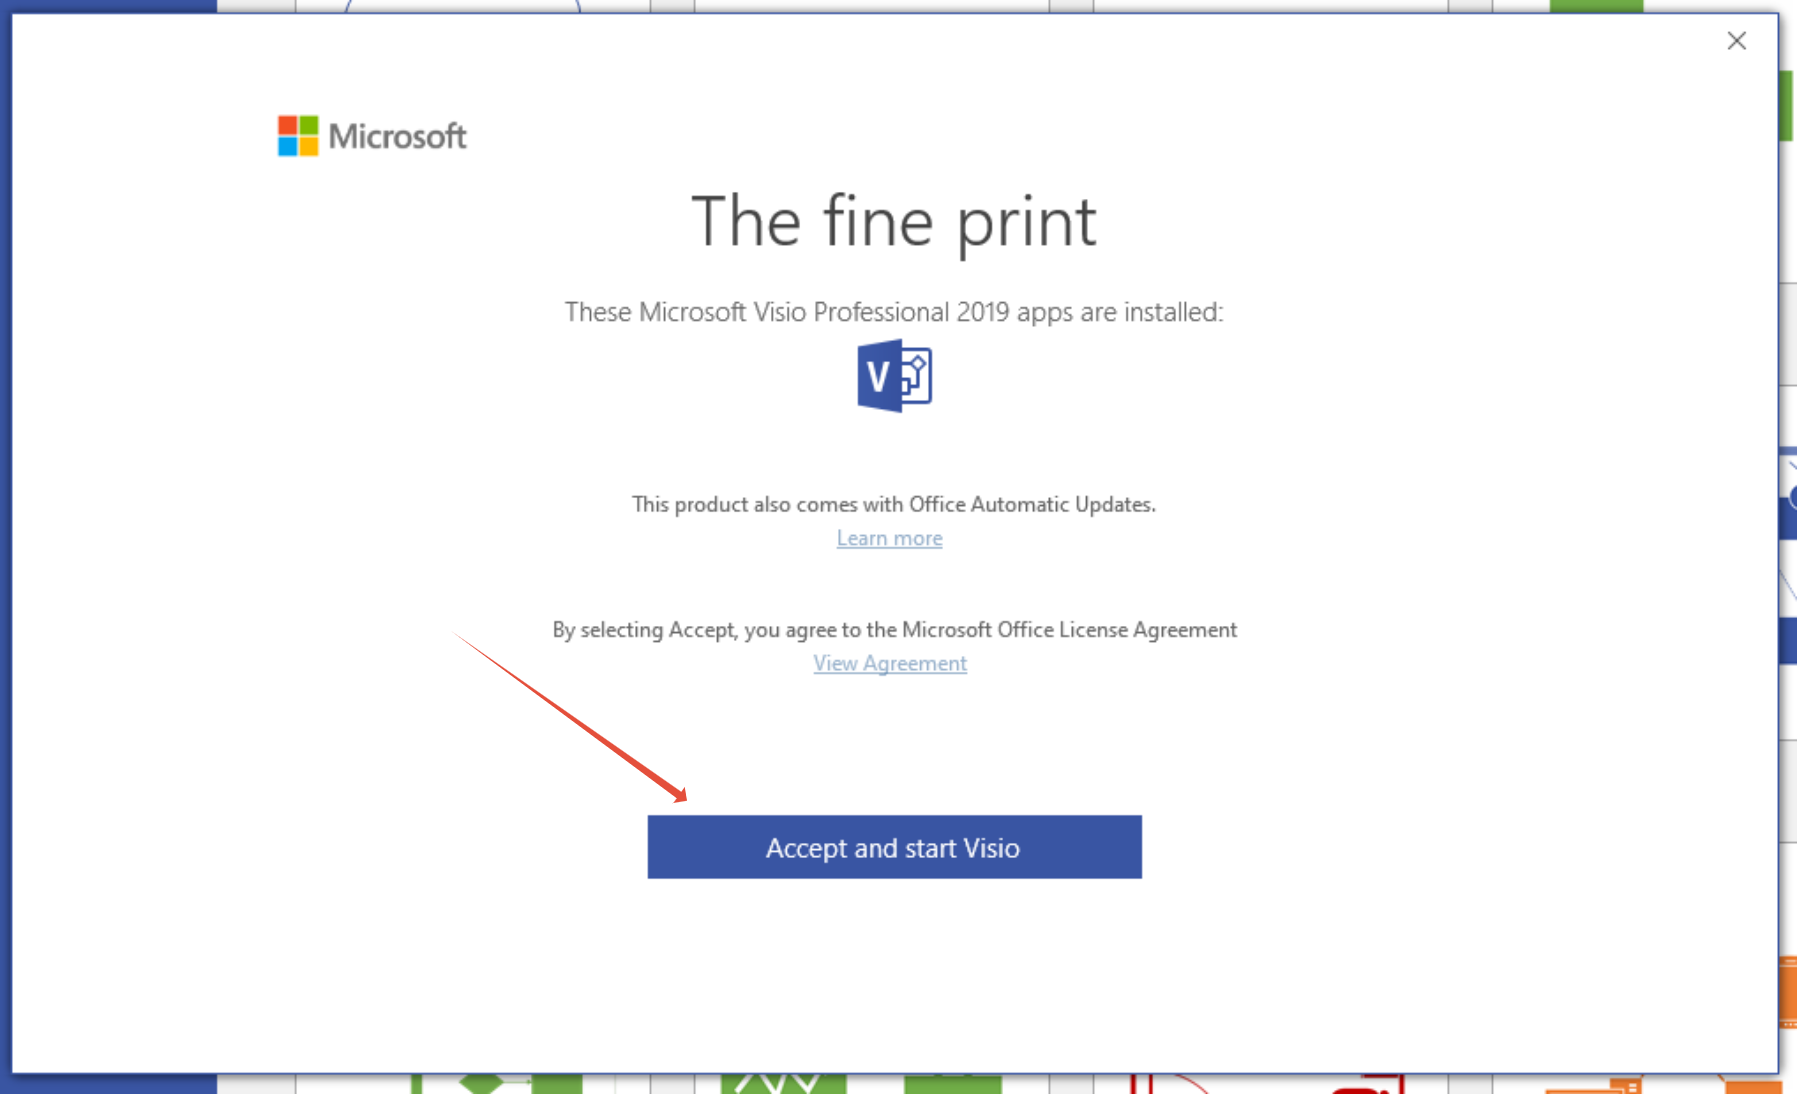
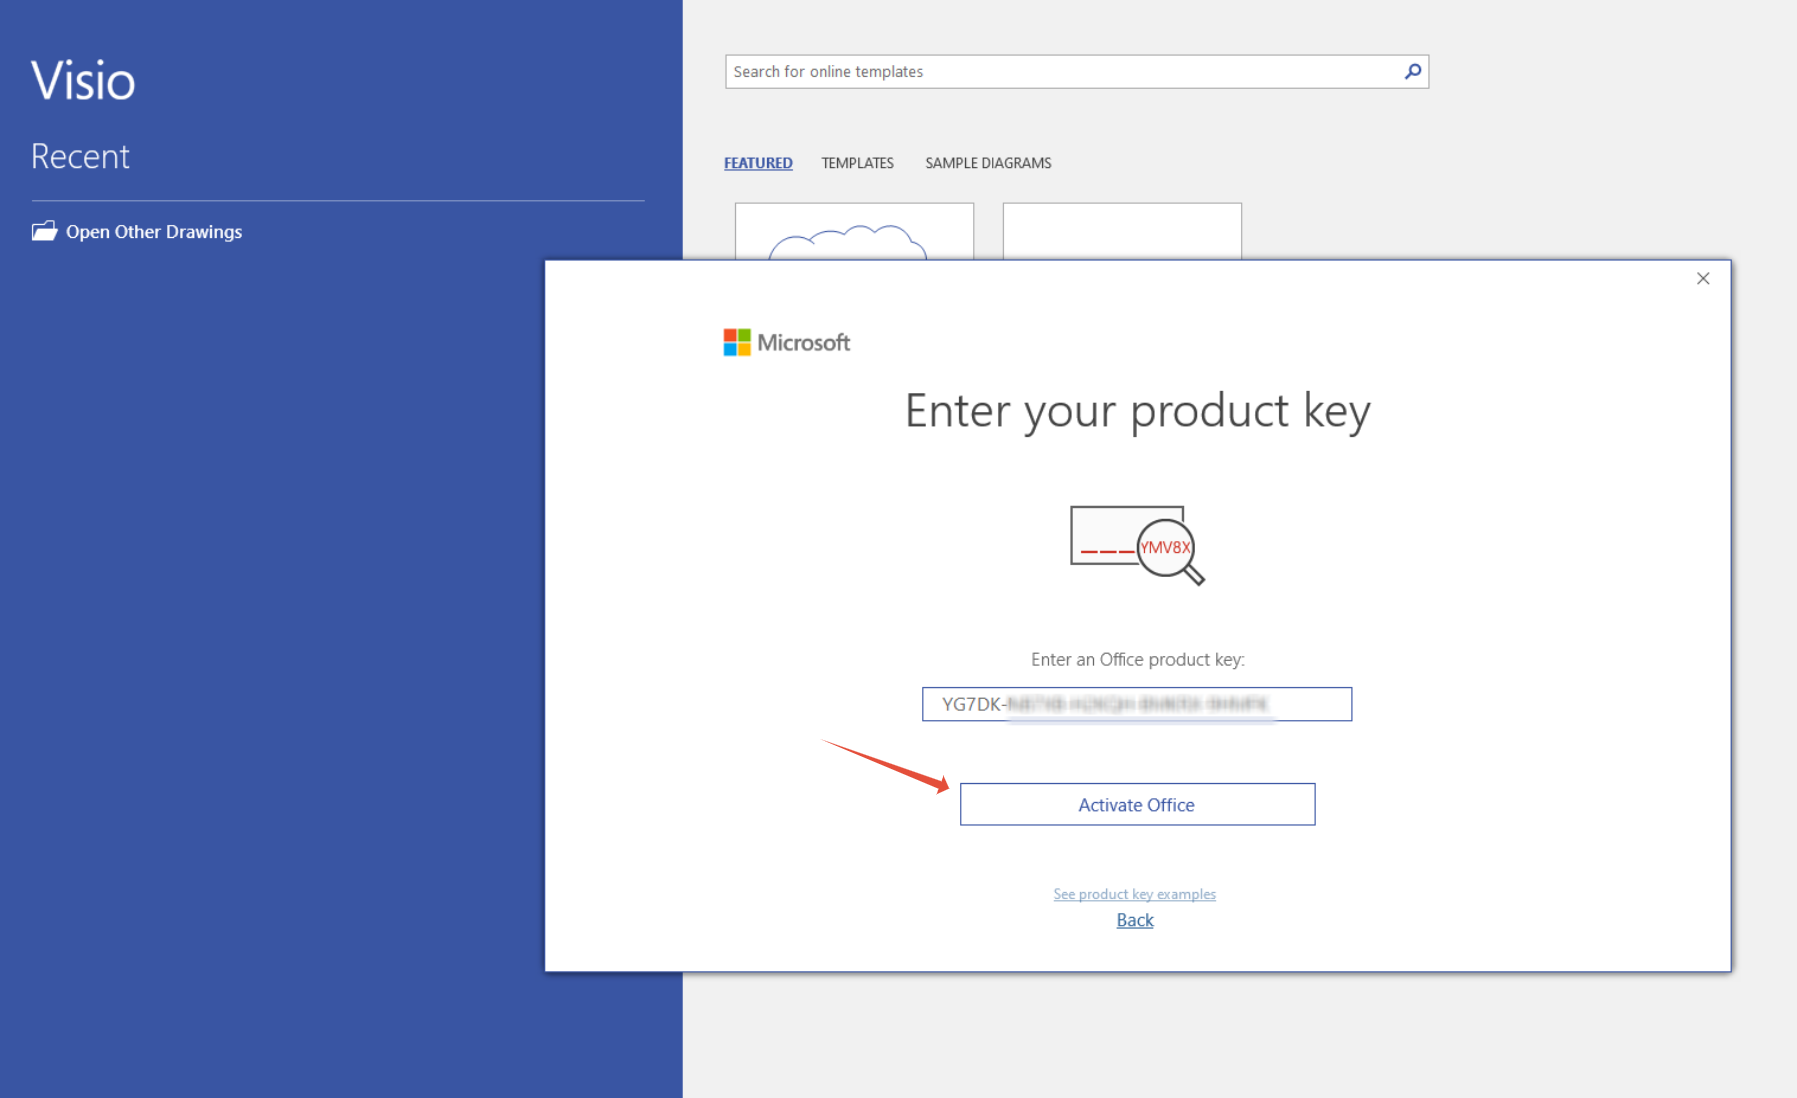
11. After launching Visio or Project you will be prompted to enter the key you saved in step 4. Note: You can always log back into the Azure Education website to retrieve the key.
12. Accept the term to start using Visio or Project.